Contributing to a GitHub repository requires an understanding of Git and collaborative workflows. This guide covers cloning, forking, pull requests, and essential Git commands, along with a list of resources if you need more help. Most of the time, cloning, forking, pull requests and basic Git commands are enough to get you going, but it’s always good to have a list of resources to refer to when you need help. Let’s dive in!
This article is mainly focused for the hackathon participants, and does not cover advanced Git topics. If you’re looking for a more advanced Git tutorial, you can refer to the resources at the end of the article.
Table of Contents
- Initial Steps
- Cloning a Repository
- Making Changes to the Project Files
- Synchronizing Changes with the Remote Repository
- Forking a Repository
- Submitting a Pull Request
- Git Commands Quick Reference
- Ending Notes and Resources
Initial Steps
Before you can contribute to a repository, you need to find one that you’re interested in. You can search for repositories on GitHub using the search bar at the top of the page. Once you’ve found a repository that you want to contribute to, you can follow the steps below to start contributing. I’m taking an example of my own repository here. You can replace the URL with the repository you want to contribute to.
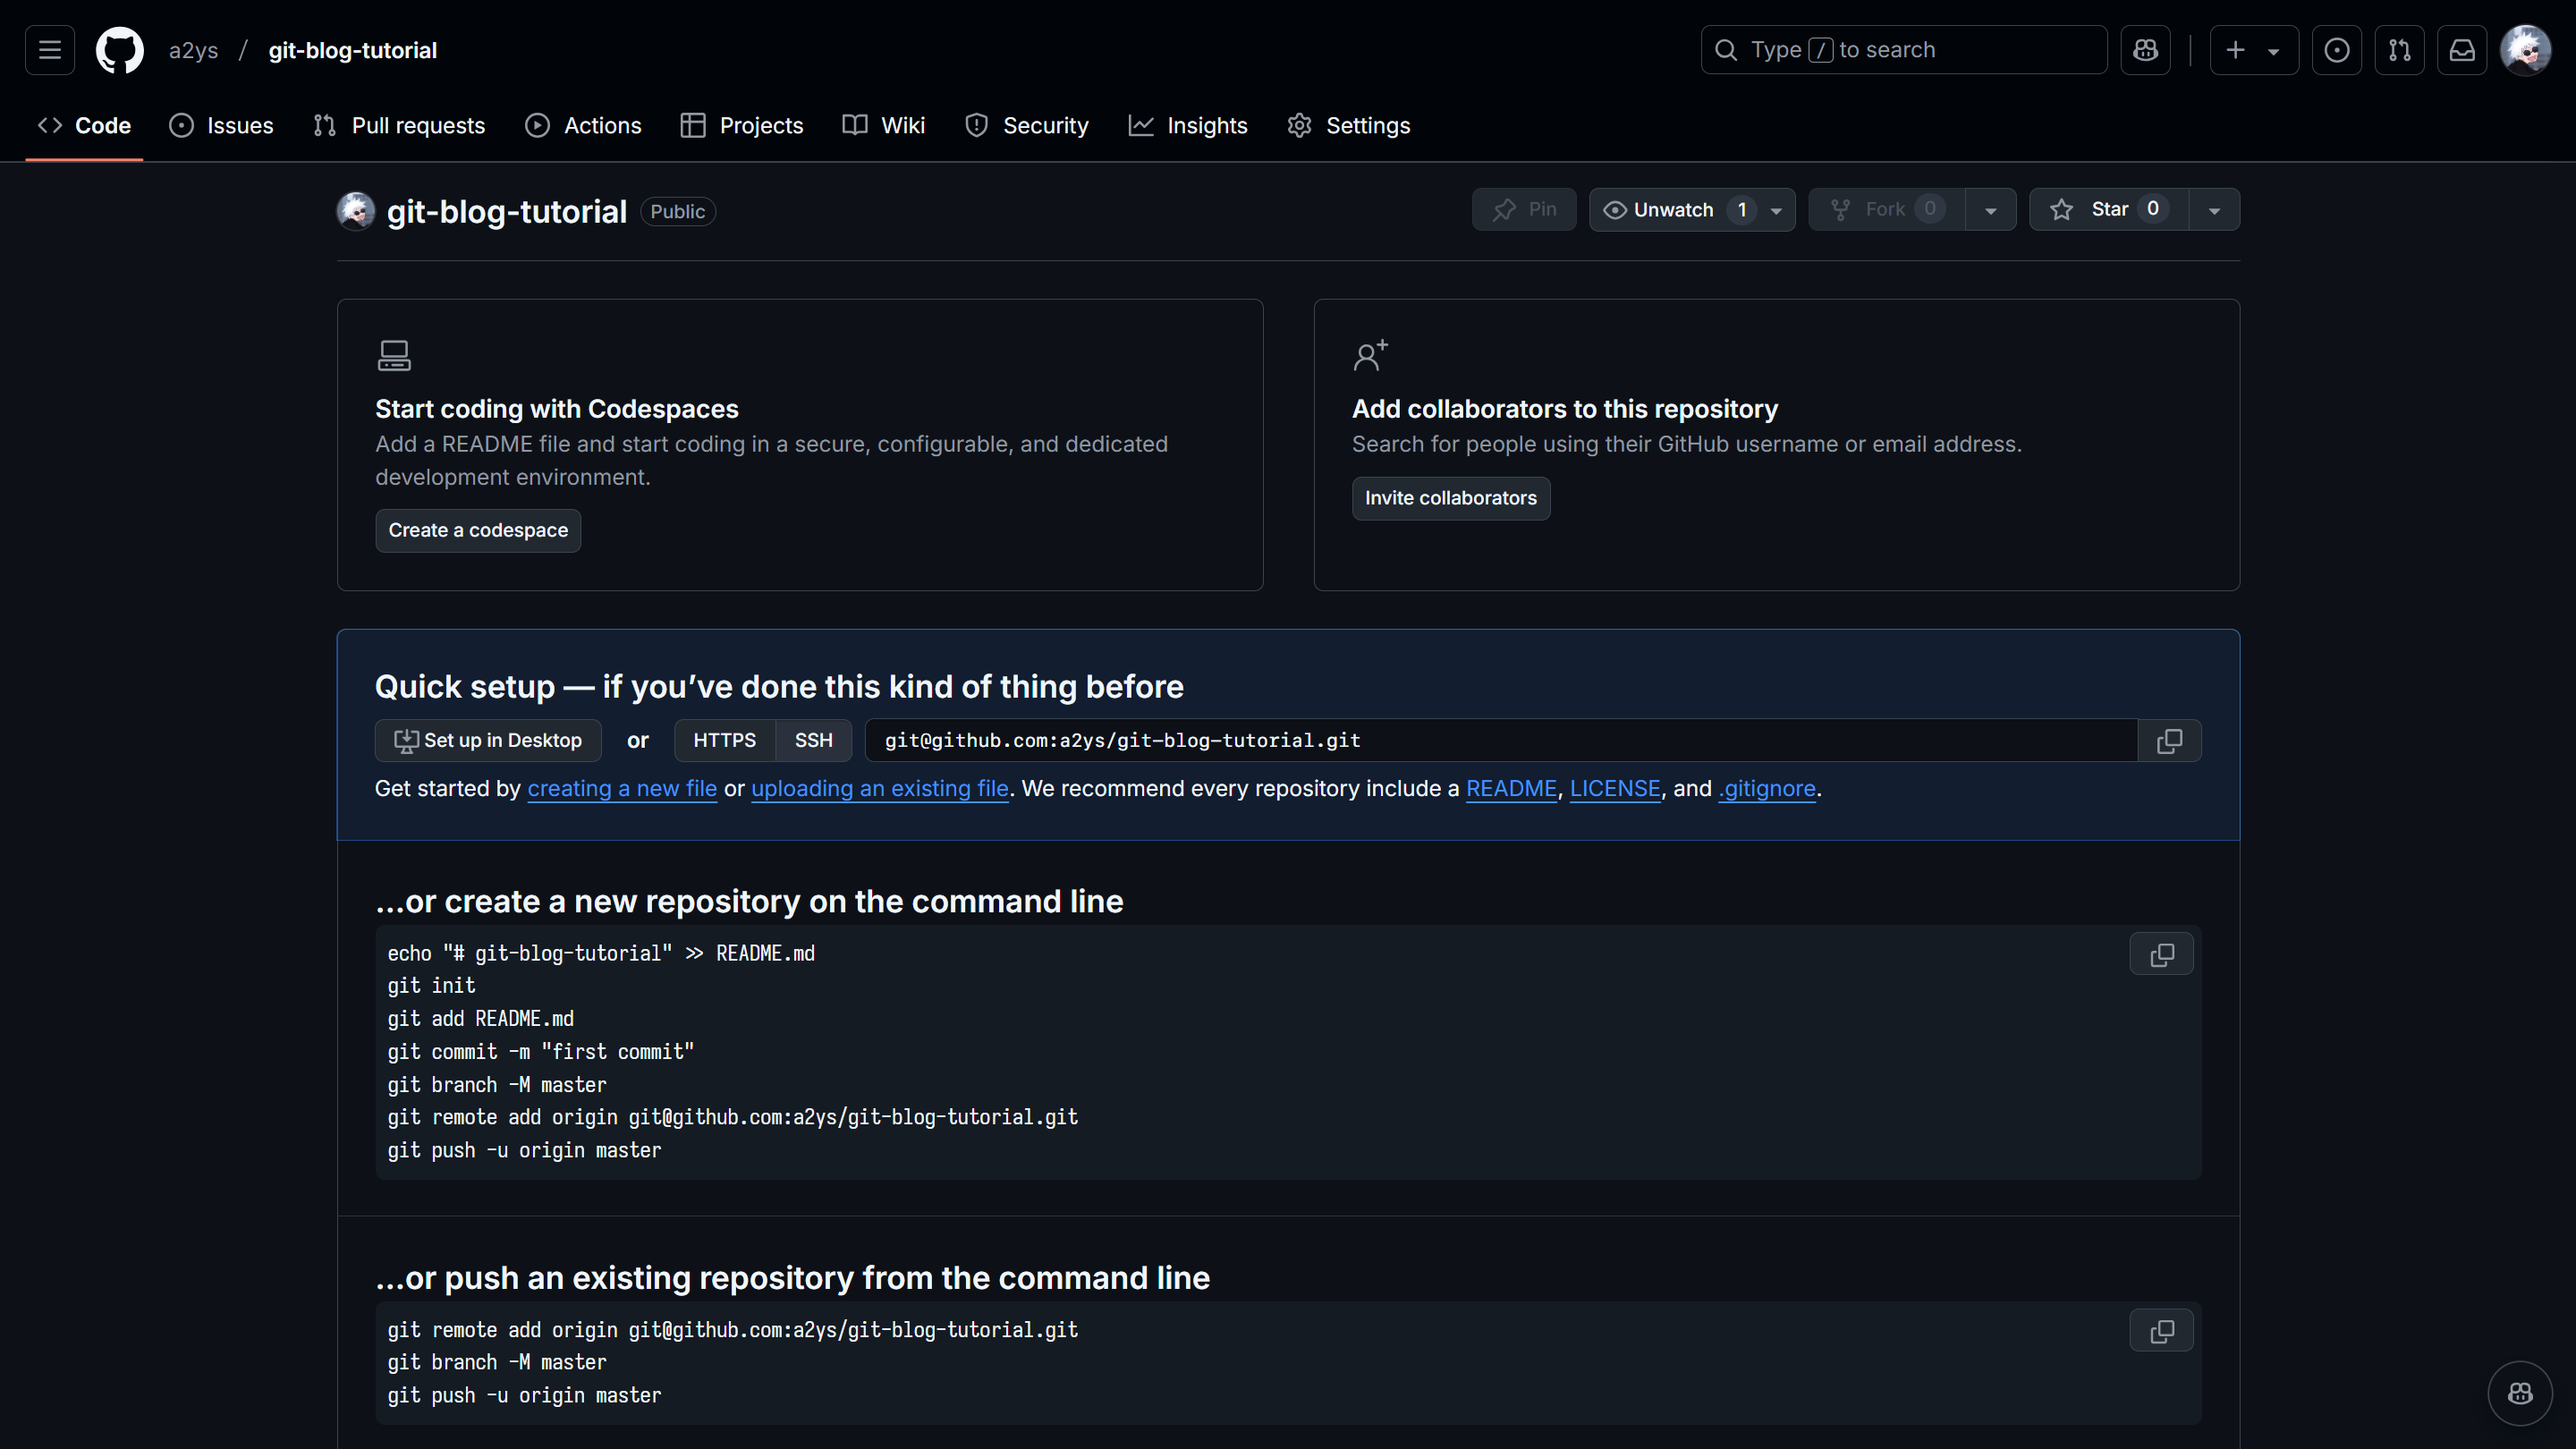
This is how an empty repository looks like:
Cloning a Repository
If you’re contributing to a repository owned by someone else, you need to fork the repository first. Forking is covered in a later section in the article. You can jump to the Forking section first if you want to contribute to a repository owned by someone else, else you can continue reading this section.
To contribute to an open-source project in a futureproof manner, you should ideally clone the repository on your local machine. By cloning the repository, you create a local copy of the project that you can work on without affecting the original codebase. Here’s how you can clone a repository:
-
Identify the Repository: Navigate to the target repository’s page on GitHub. This repository serves as the central hub for project coordination.
-
Clone the Repository:
-
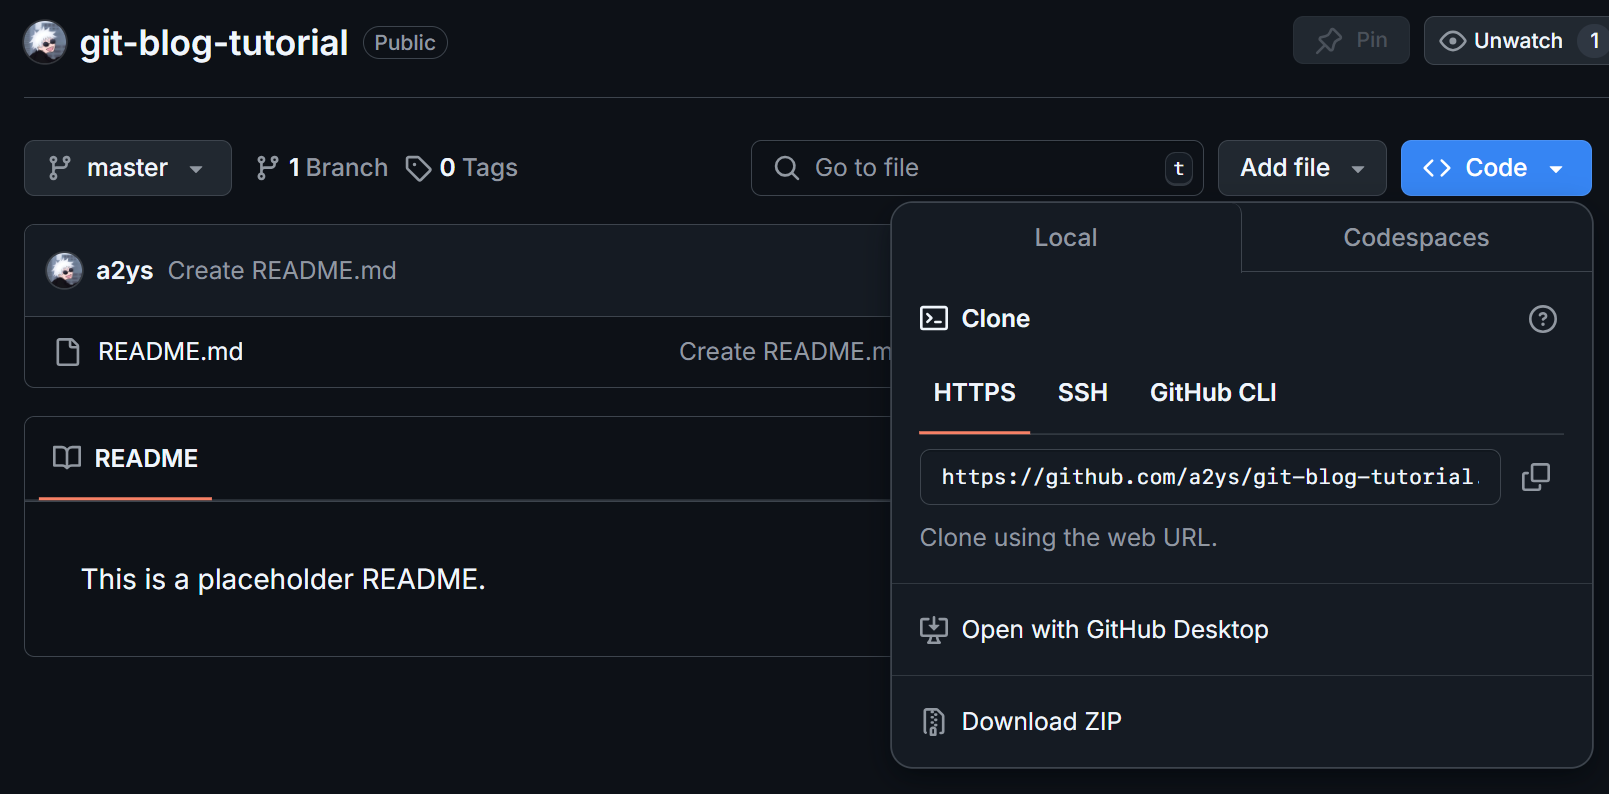
Copy the HTTPS or SSH URL from the repository’s GitHub page. The URL is typically displayed under the Code button.
-
You need to copy the URL from the repository. You can do so by clicking on the Copy button next to the URL. After you’re done copying the URL, you can clone the repository using the following command:
git clone <repository-url>For example, in my case, it is:
git clone https://github.com/a2ys/git-blog-tutorial.git
-
-
Navigate to the Project Directory:
You cannot start off directly if you’re not in the project directory. This is a common mistake that beginners make. You need to navigate to the project directory using the following command:
cd repositoryFor example, in my case, it is:
cd git-blog-tutorialThis command grants access to the project’s structure and files, ready for development. You can now make changes to the project files.
Making Changes to the Project Files
After you’re done cloning the repository and navigating to the project directory, you can start making changes to the project files. You can use any text editor or IDE to make changes to the files.
-
Create a New Branch (Optional):
Even though creating a new branch is optional, it is a good practice to create a new branch for every feature or bug fix that you’re working on, or . This way, you can isolate your changes and work on them without affecting the main branch. You can create a new branch using the following command:
git checkout -b <branch-name>A branch isolates your changes, enabling parallel workstreams without affecting the main branch or the work of others. You can also work on a project without making a new branch, but it is not recommended.
-
Make Edits: Use an IDE or text editor to modify files as needed, adhering to project standards.
-
Stage Changes:
Staging prepares changes for inclusion in the repository’s history and allows you to group related changes together. This also prepares the changes for a commit. You can stage changes with the following commands:
-
To stage specific files:
git add <file-name> -
To stage all updated files:
git add .
-
-
Commit Staged Changes:
Now that you’ve staged the changes, you can commit them to the repository. Committing changes records the modifications in the repository’s history. You can commit changes using the following command:
git commit -m "Descriptive message summarizing changes"Example:
git commit -m "Refactored API endpoint for improved performance"Descriptive commit messages enhance project transparency and maintainability. It also help the maintainers understand the changes you’ve made.
Synchronizing Changes with the Remote Repository
Till now, you’ve made the changes and committed them to your local repository. Now, you need to push these changes to the remote repository. This is important because the changes you’ve made are only on your local machine. You need to push these changes to the remote repository so that others can see the changes you’ve made.
-
Push Changes:
To push changes to a remote repository, you need to use the following command:
git push origin <branch-name> -
Validate Updates: Confirm the changes are reflected on GitHub by reviewing the branch’s file history or content.
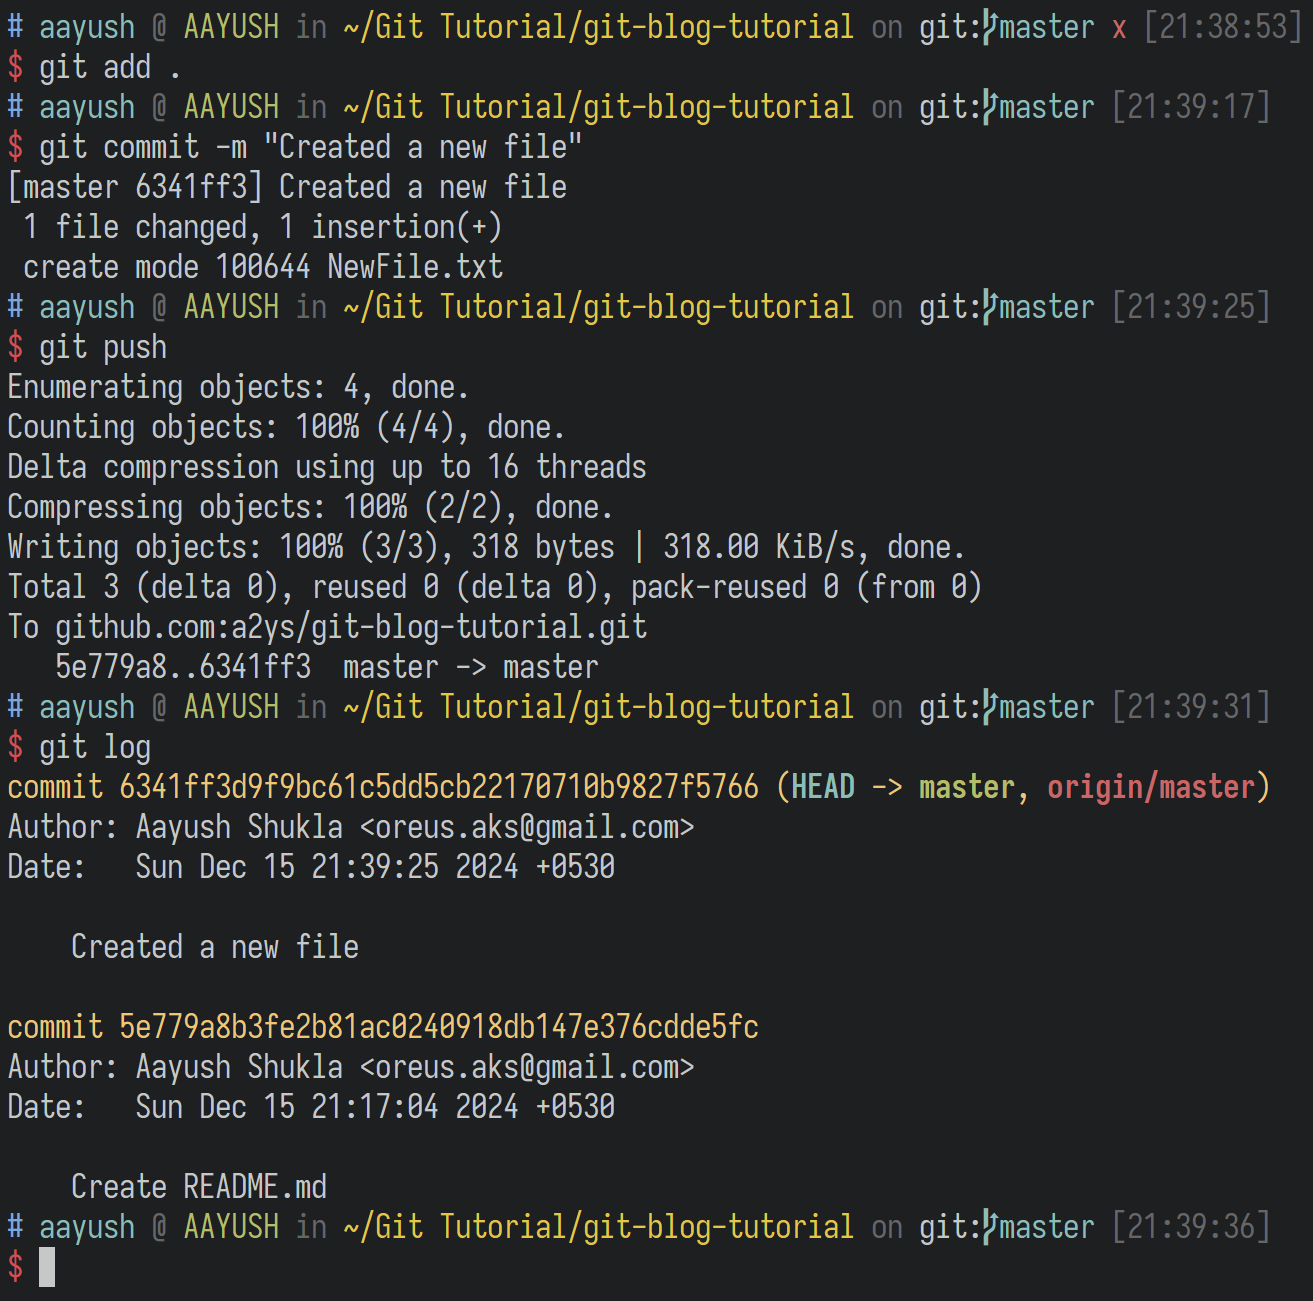
This is an example of how the commands run and what are the expected messages:
This is how the remote repository would look like after the changes are pushed:
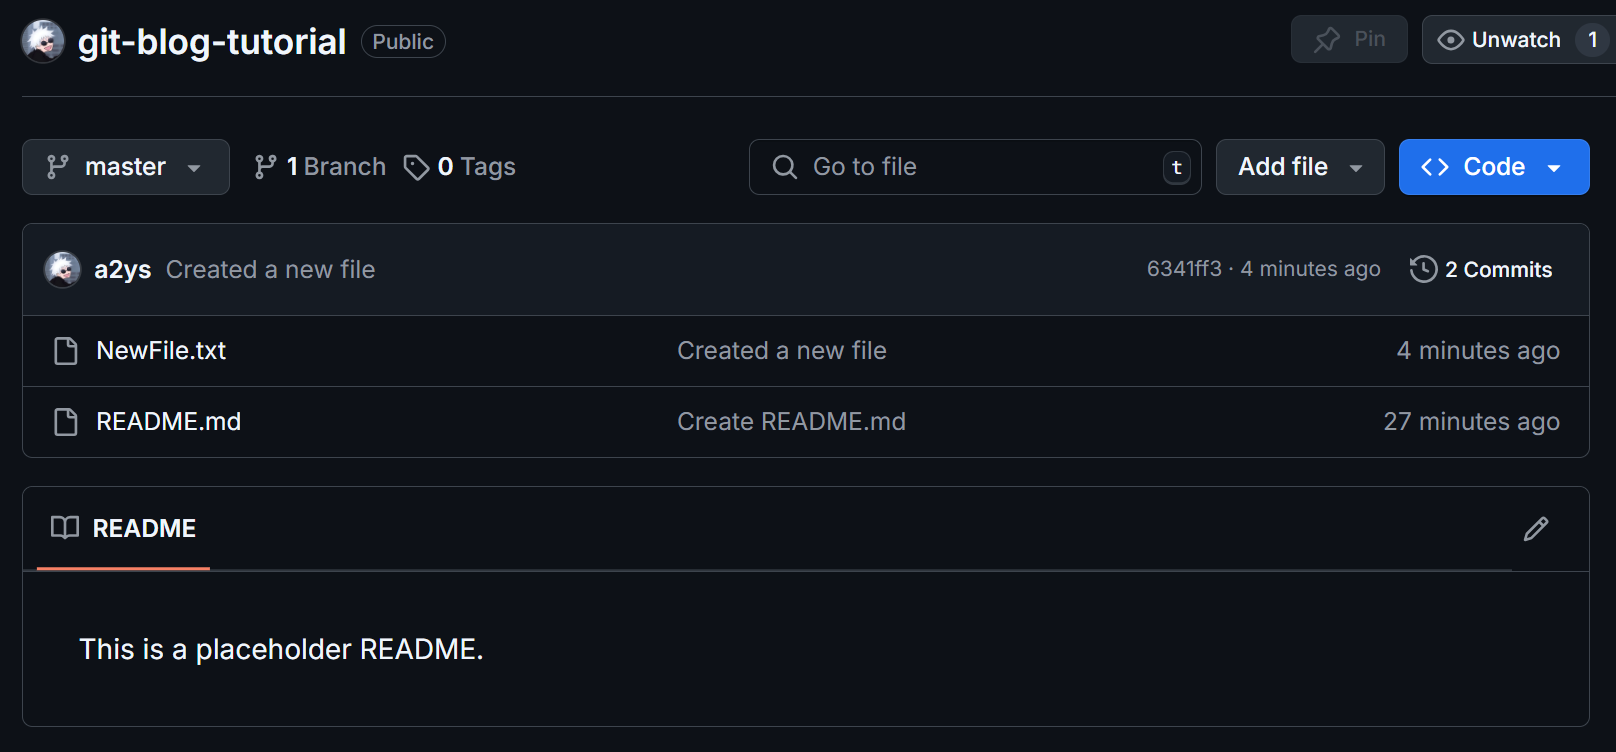
You can see the latest commit message along with the changes that were made in the commit.
Forking a Repository
Forking a repository is a way to create a copy of the repository in your GitHub account. This is useful when you want to contribute to a repository owned by someone else. By forking the repository, you can make changes to the repository without affecting the original repository. Here’s how you can fork a repository:
-
Create a Fork:
Click the Fork button on the repository’s GitHub page to copy the repository to your account. The fork button is usually located in the top right corner of the repository page.

-
Clone the Forked Repository:
Use the fork’s URL, it is the same as the original repository but with your username instead of the original owner’s username. Navigate to Cloning a Repository section to see how you can clone the repository.
-
Link the Upstream Repository:
If you are not working on a production level project, you can skip this step and the next step. These are useful when the upstream repository is updated frequently and you want to keep your fork updated with the changes in the upstream repository. There is a Sync Fork button in the GitHub UI to help you with this, but it is always good to know how to do it using the command line.
To link the upstream repository, you need to add a new remote to your local repository. You can do this using the following command:
git remote add upstream https://github.com/original-username/repository.gitThis linkage facilitates synchronization with the original repository. Adding the upstream remote allows you to fetch changes from the original repository and merge them into your fork. This helps keep your fork updated with the latest changes from the source repository.
-
Fetch Updates from Upstream:
To fetch updates from the upstream repository, you can use the following command:
git fetch upstream
git merge upstream/<branch-name>
This avoids merge conflicts and ensures your work is based on the latest changes. Covering this step in detail is not in the scope of this article, but you can refer to the resources at the end of the article to learn more about this.
Submitting a Pull Request
After you’ve made the changes and pushed them to the remote repository, you need to submit a pull request to the original repository. A pull request is a way to notify the maintainers of the original repository that you’ve made changes and that you want them to review and merge your changes. Here’s how you can submit a pull request:
-
Push Your Feature Branch:
git push origin <branch-name> -
Create the Pull Request:
- Go to your fork on GitHub.
- Click the Pull Requests tab and select New Pull Request.
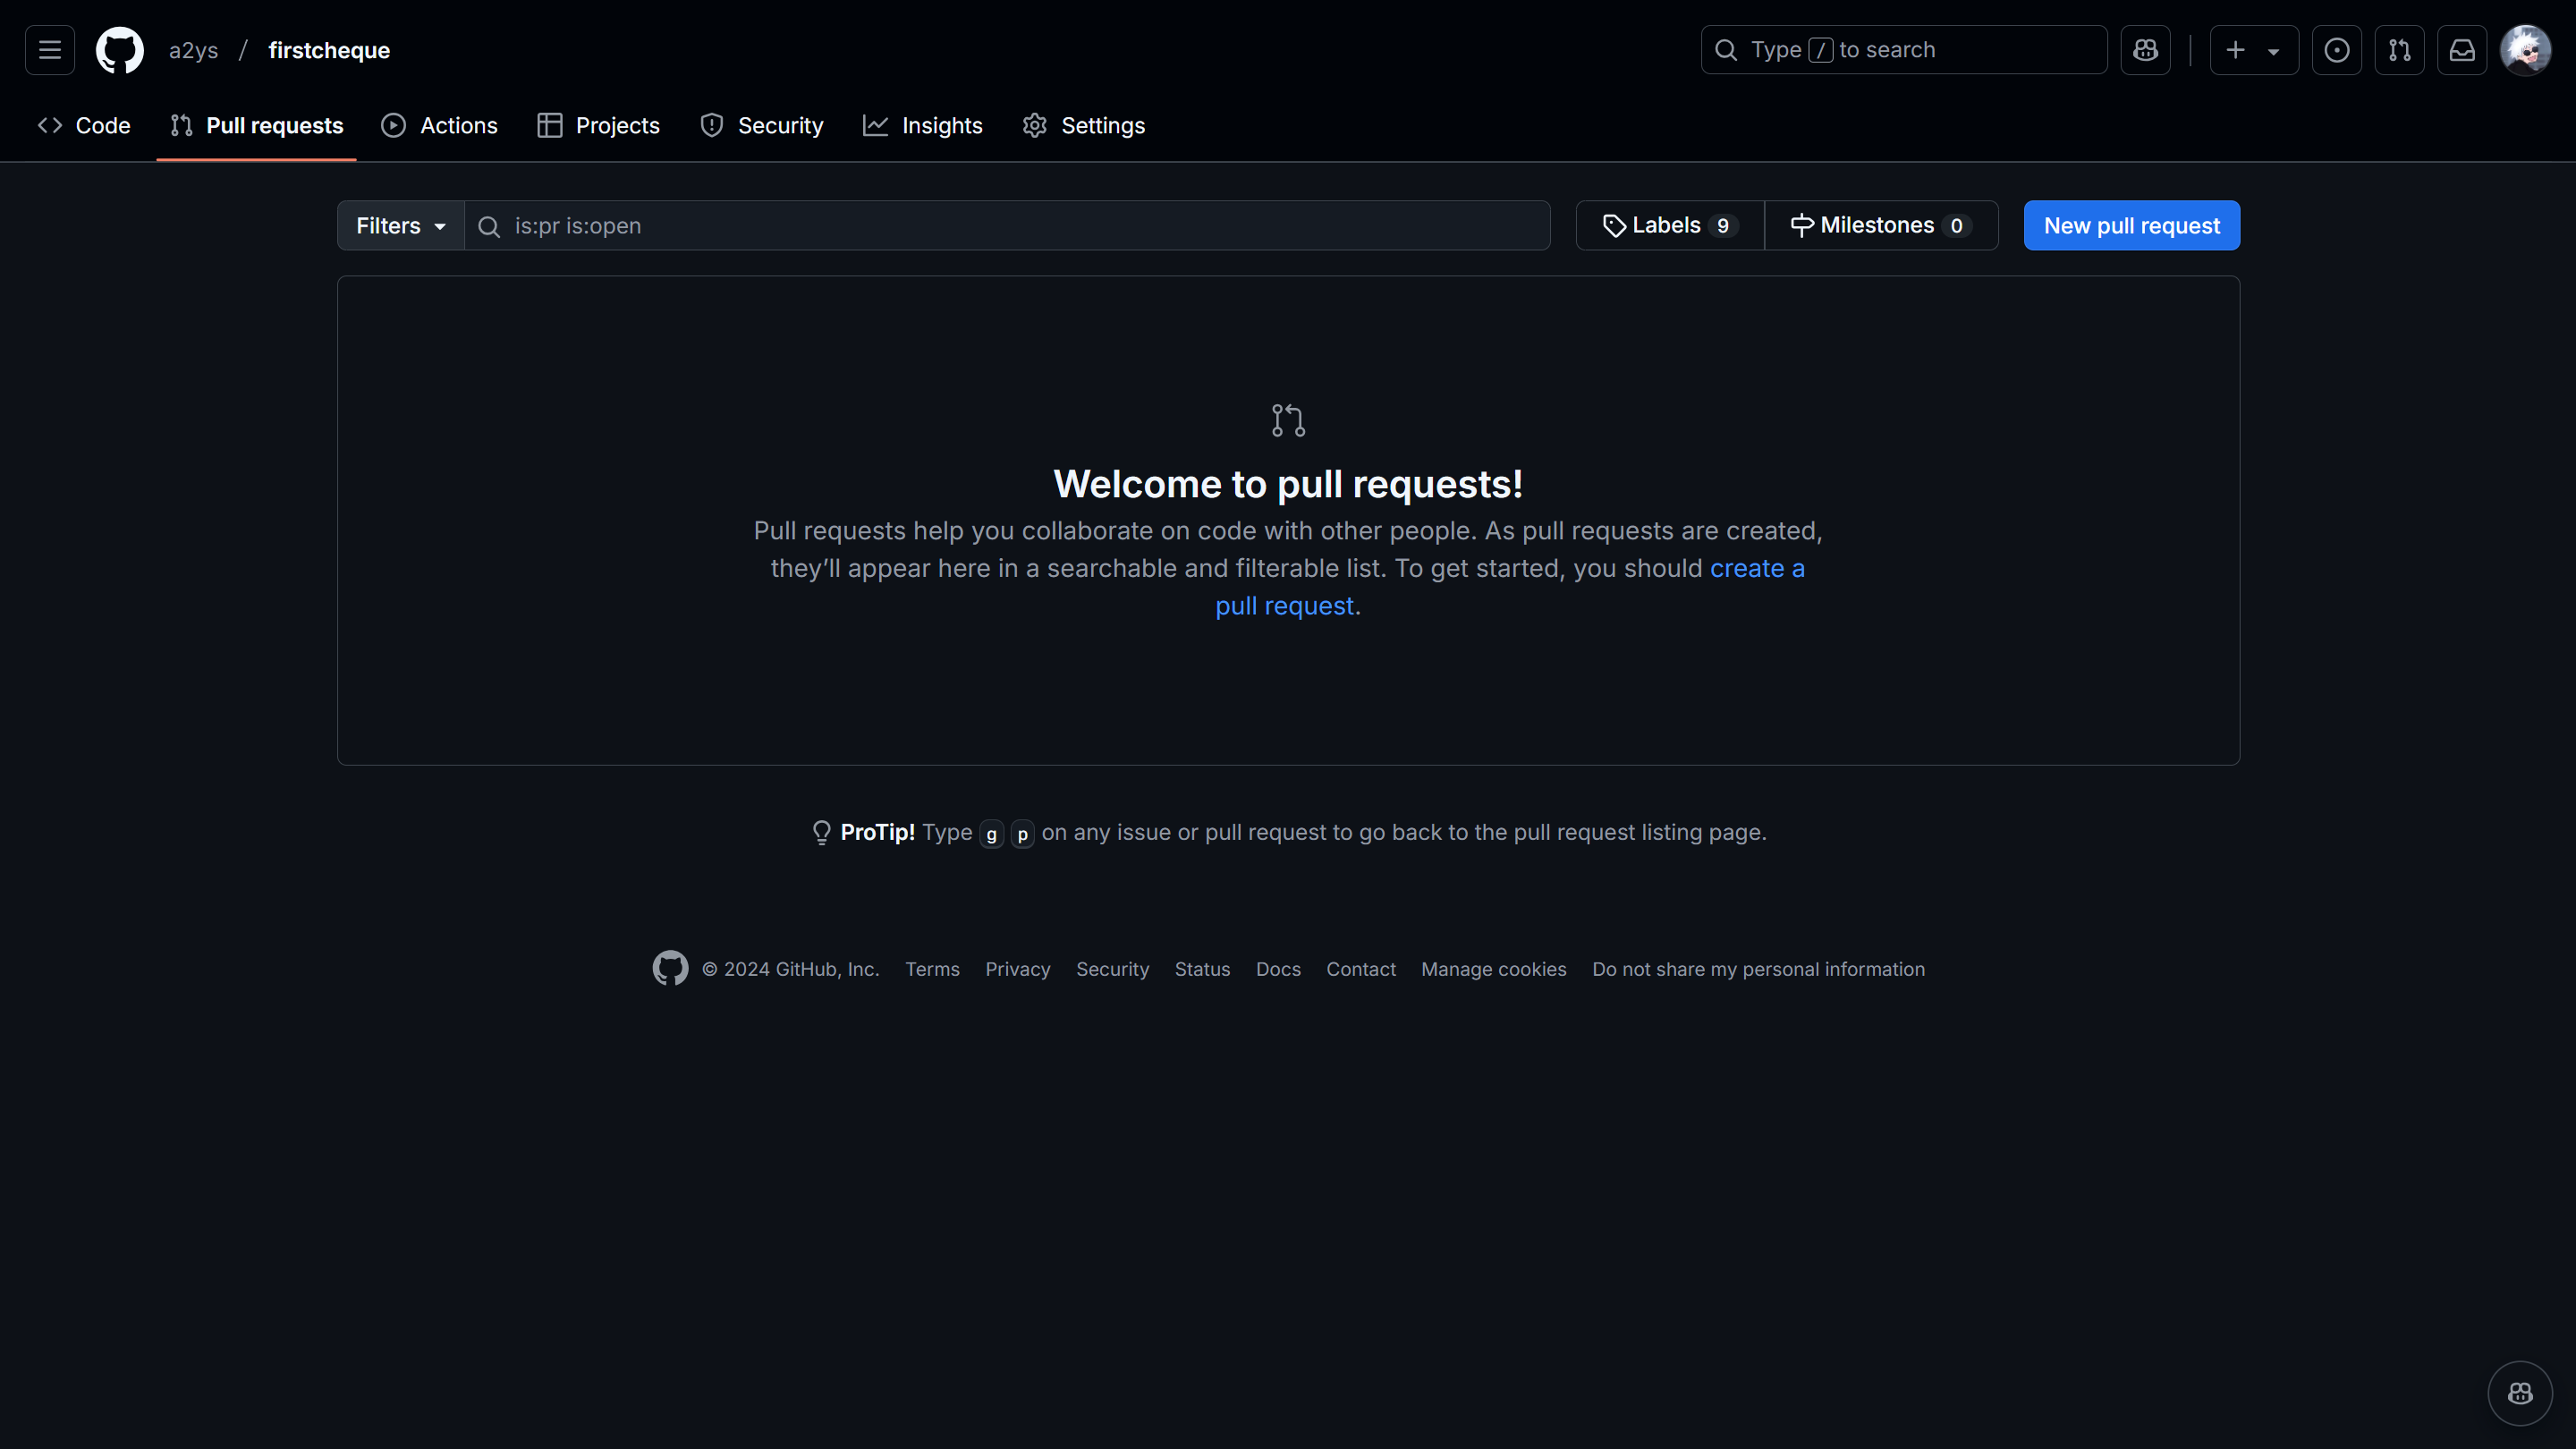
- Choose the base repository and branch to compare against your feature branch.
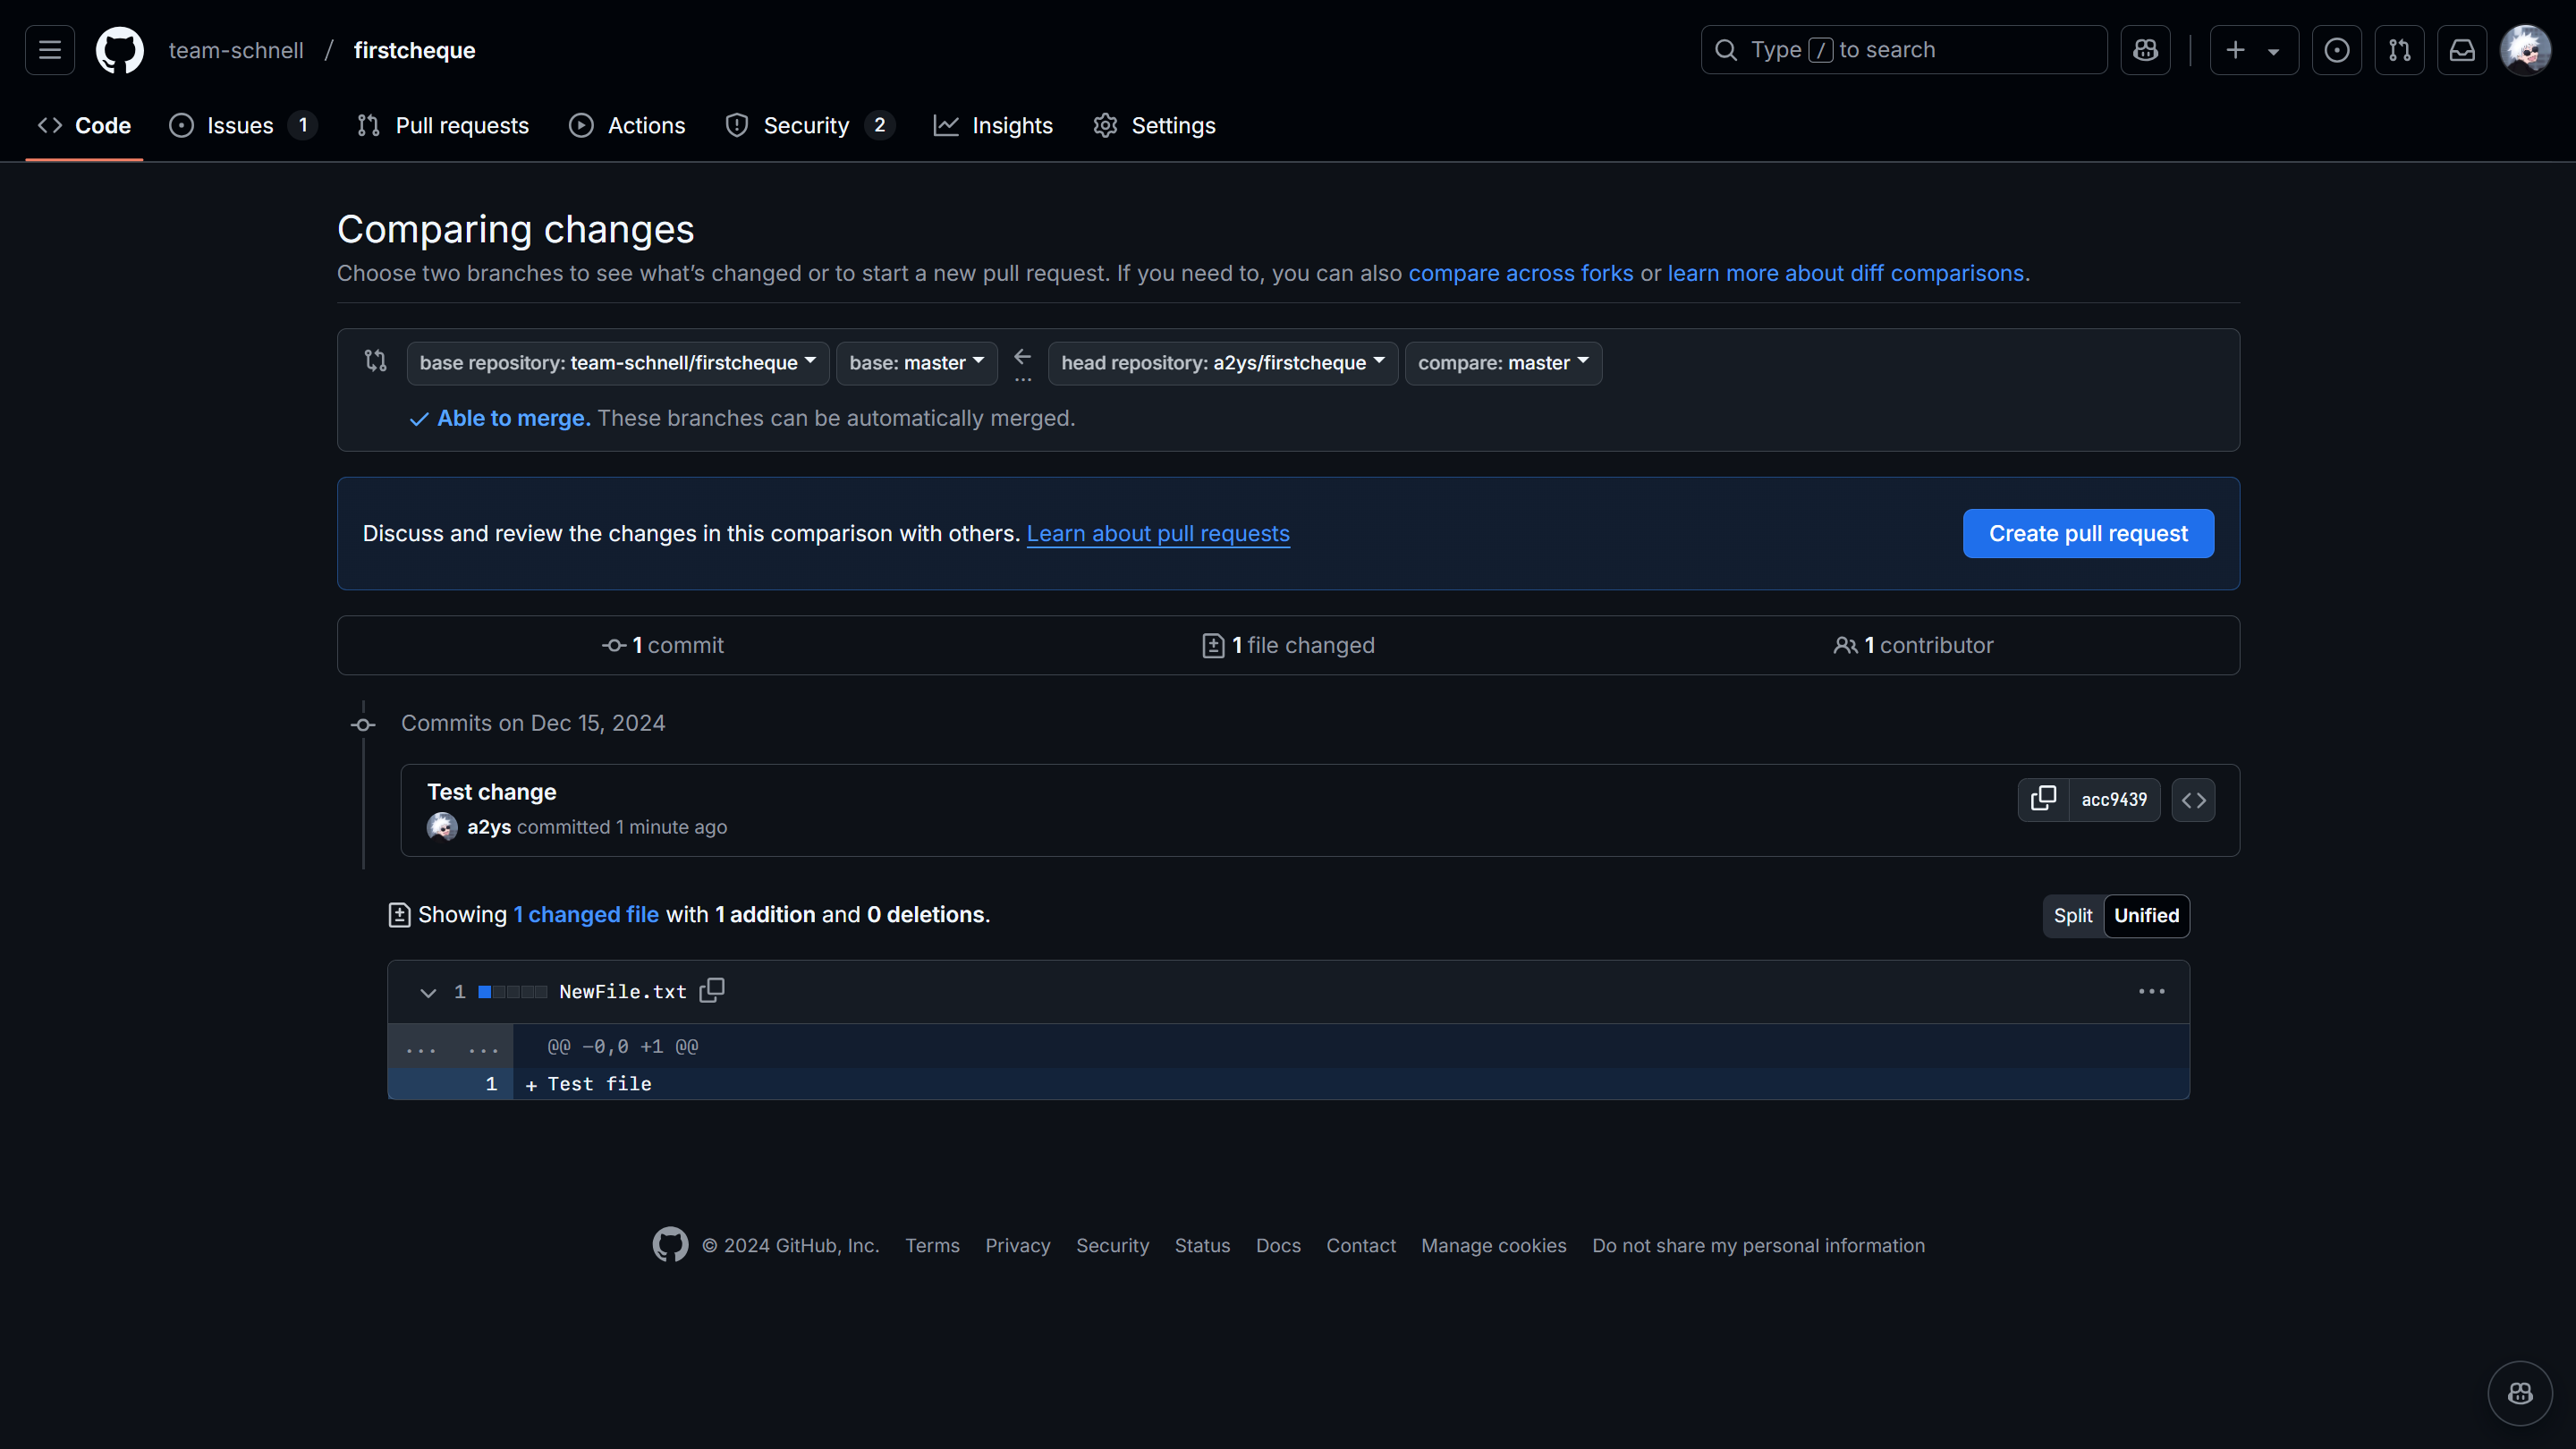
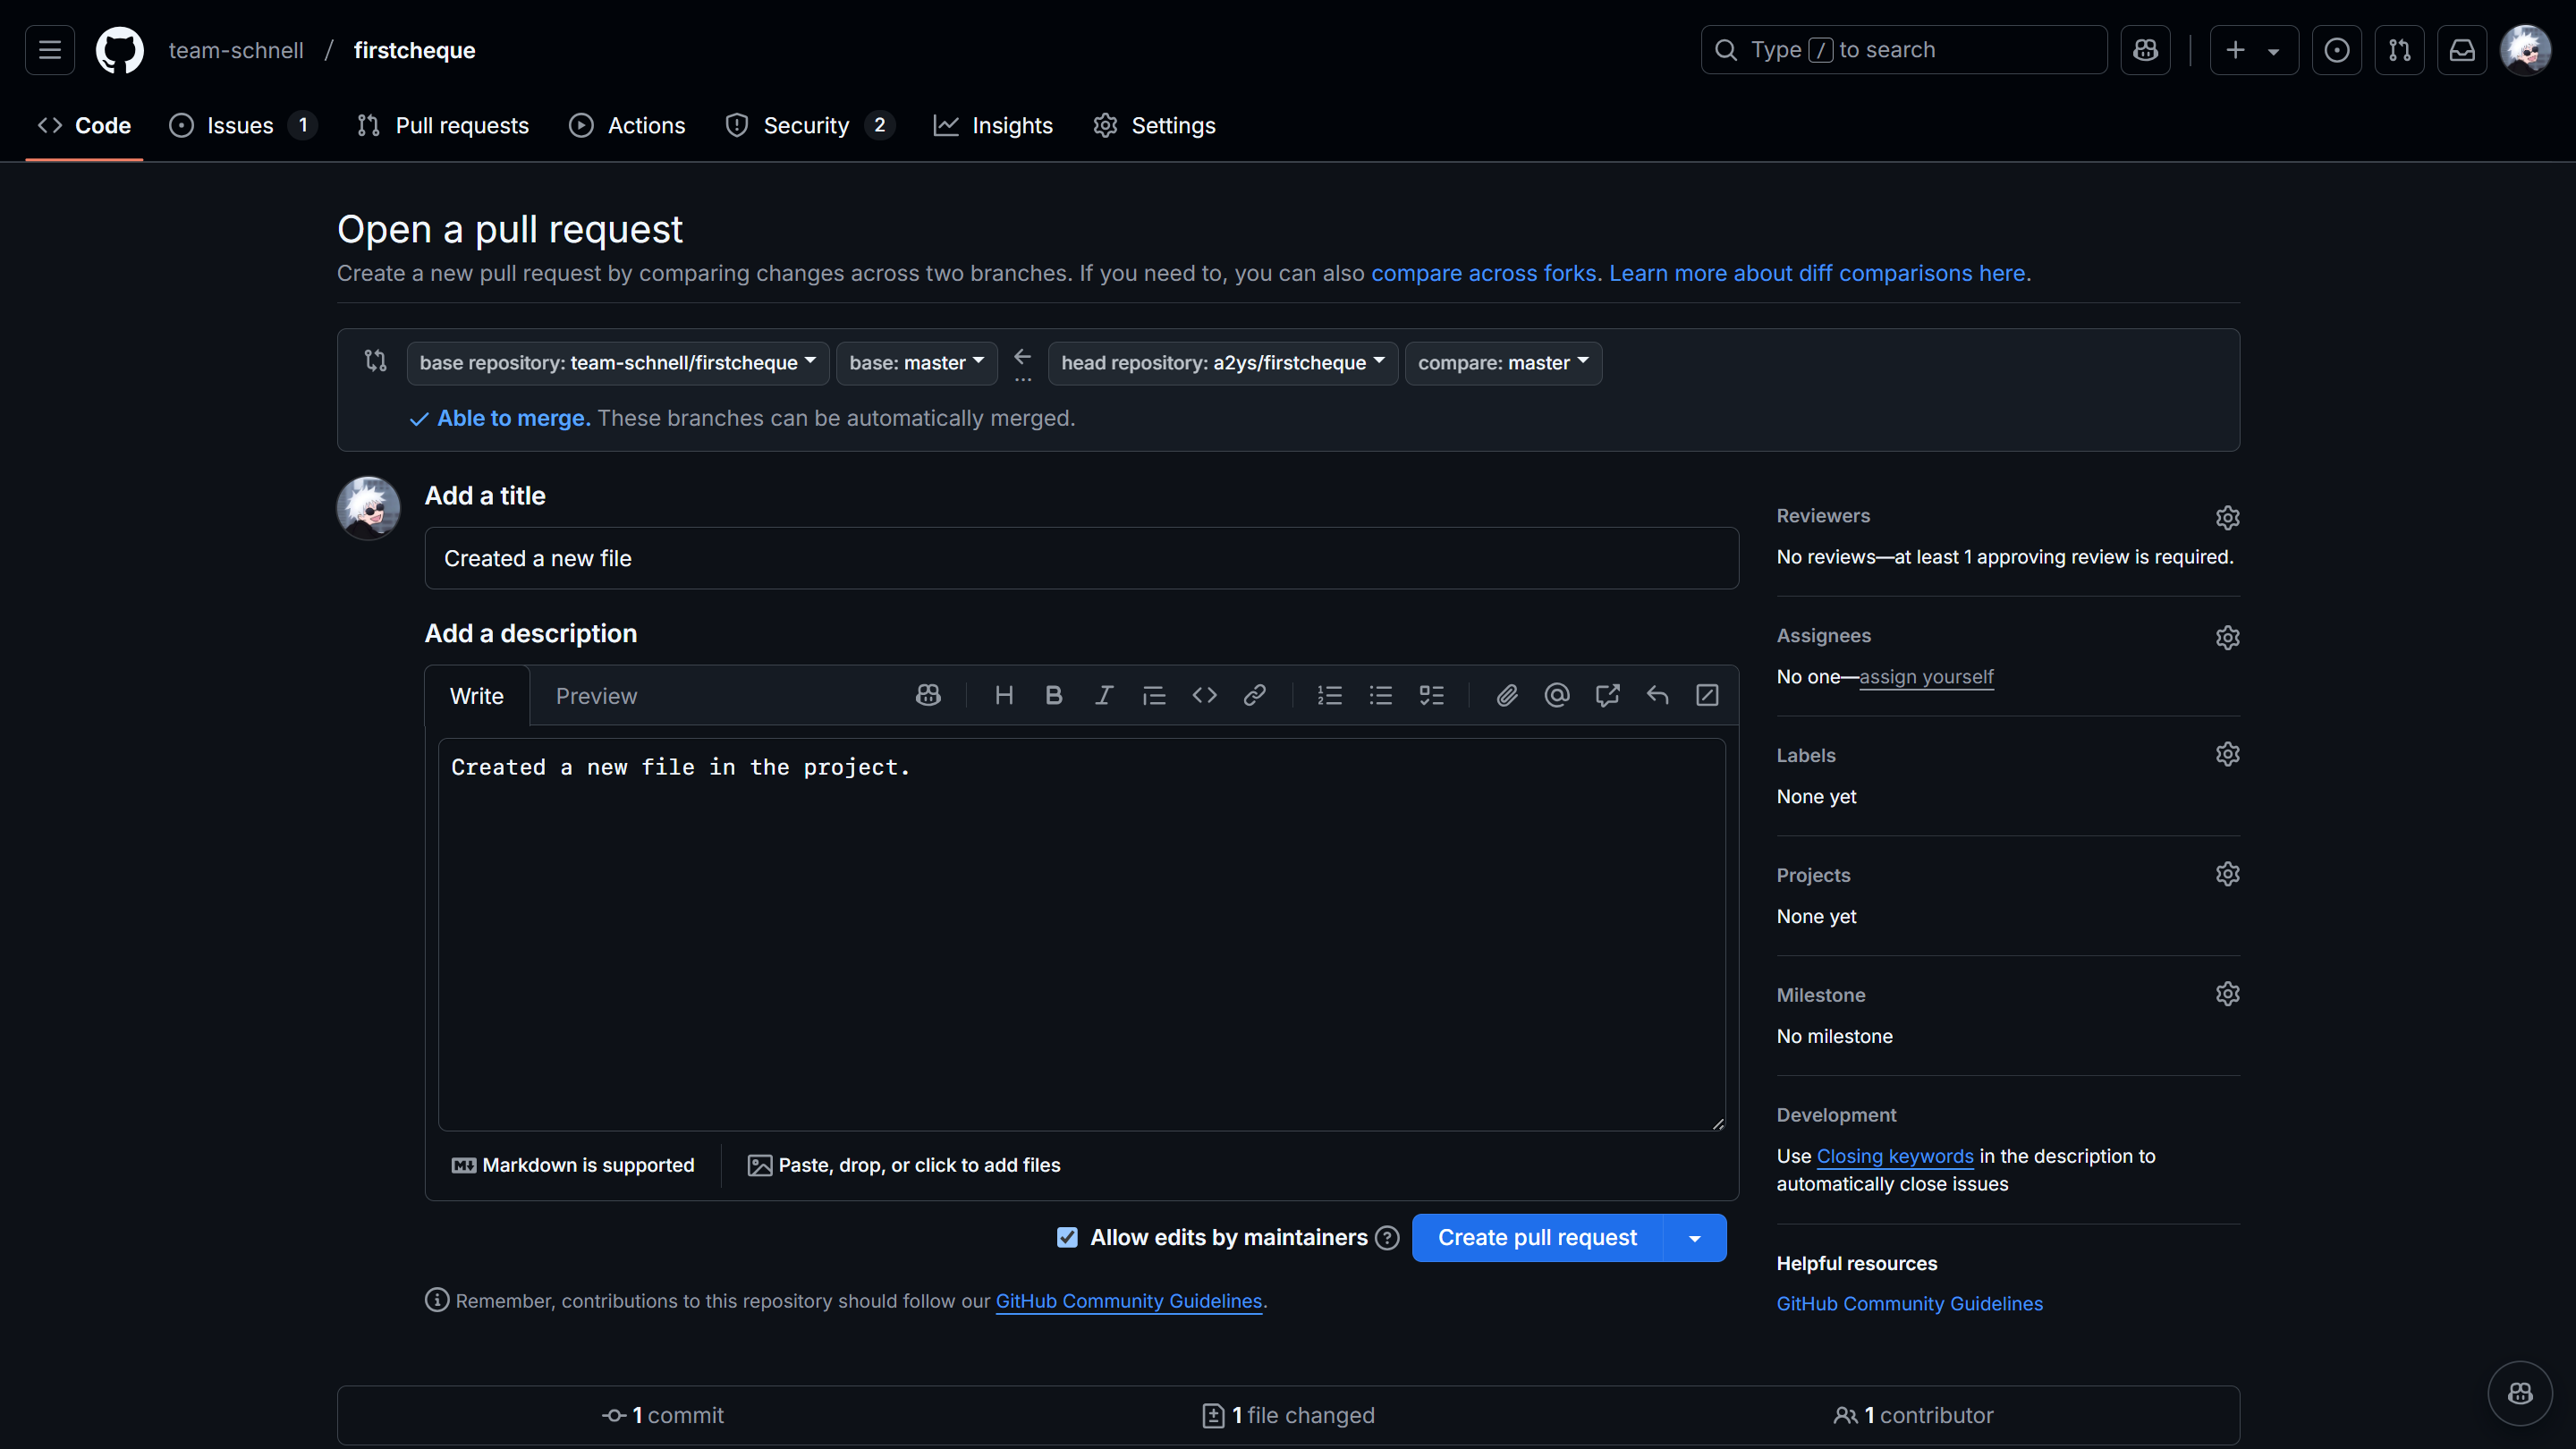
- Add a title and description to summarize the changes made in the pull request.
-
Submit the PR:
- Click Create Pull Request and include supplementary information if necessary.
-
Respond to Feedback: Engage with maintainers to address comments or requested changes, ensuring the PR meets project requirements.
Git Commands Quick Reference
-
Clone a Repository:
git clone <repository-url> -
Create a New Branch:
git checkout -b <branch-name> -
Stage Changes:
git add . -
Commit Changes:
git commit -m "Message summarizing the update" -
Push Changes:
git push origin <branch-name> -
Add Upstream Remote:
git remote add upstream <original-repo-url> -
Fetch Updates from Upstream:
git fetch upstream -
Pull Upstream Changes:
git pull upstream main
Ending Notes and Resources
This blog was a brief introduction to contributing to GitHub repositories. If you want to learn more about Git and GitHub, here are some resources that you might find helpful:
- Builders-Hut/Resources: A short and concise guide to Git and GitHub from Aditya Jyoti under the Builders Hut repository.
- GitHub Guides: Official guides from GitHub to help you learn more about Git and GitHub.
- Pro Git Book: A comprehensive guide to Git.
